In this post, I’ll walk you through creating an Azure AD Application and configuring NGIX API Connectivity Manager to protect API endpoints via Azure AD credentials.
Create an Azure AD Application
Open a browser and log in to your Azure Portal: https://portal.azure.com
Click on App registrations in the left-hand menu.

Click on the New registration button.

To create a new application, supply a name, redirect URI and click the Register button. Note: we will leverage Postman in this demo, so I will use the Postman OIDC redirect URI.

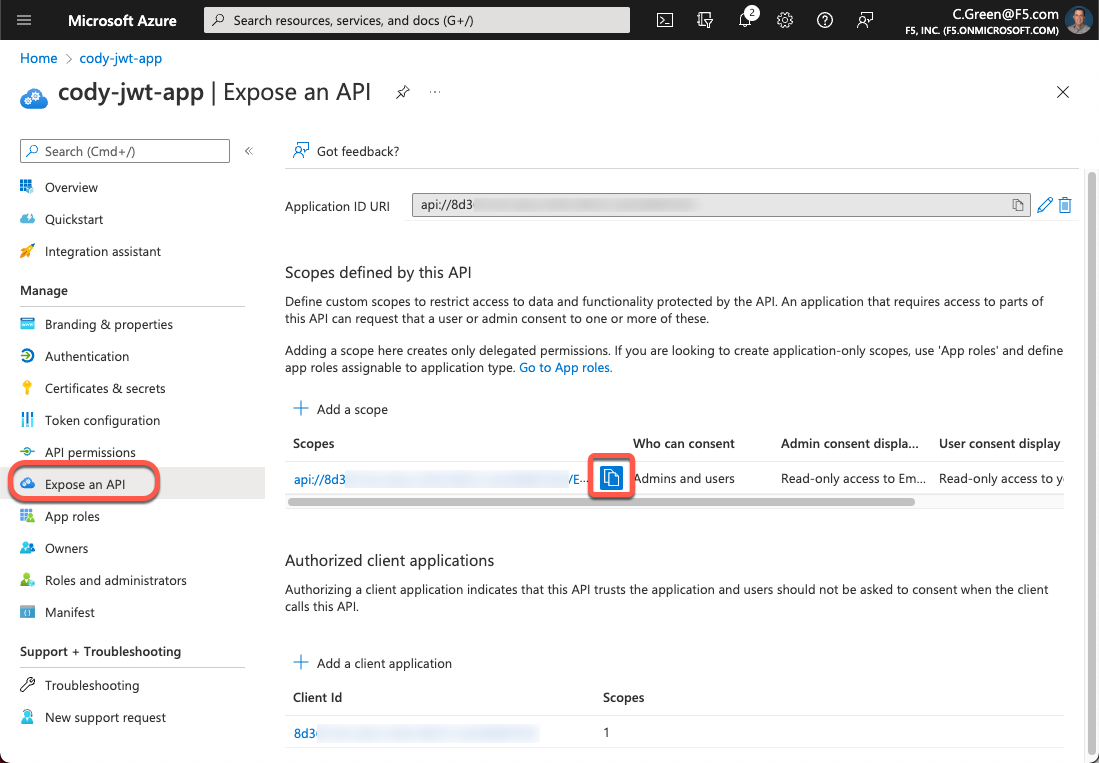
Now that our app is created, we need to create OAuth scopes to provide access to our API. Click on the Expose an API link in the left-hand menu.

Click Add a scope.

Accept the default Application ID URI or create your own and click the Save and continue button. Note: to create your own Application ID URI, the desired domain must be registered with Azure AD.

For this demo, we will base our scope upon a Microsoft example. Fill out the form with the information below and click the Add scope button.
Scope name: Employees.Read.All
Who can content?: Admins and users
Admin consent display name: Read-only access to Employee records
Admin consent description: Allow read-only access to all Employee data.
User consent display name: Read-only access to your Employee records
User consent description: Allow read-only access to your Employee data.

Next, we’ll need to authorize the client application. To do this, we will need to grab the Client ID. Click on the Overview link in the left-hand menu and copy the Application (client) ID.

Click on the Expose an API link again, and then click the Add a client application button.

Paste the Application Client ID in the Client ID field and select the checkbox next to your Application ID URI, then click the Add application button.

Next, for this demo, we will leverage an authorization code with PKCE OAuth grant type, so a client secret will be needed for Postman. Click on the Certificates & secrets link in the left-hand menu, then click the New client secret button.

Name your secret and leave the default expiration time.
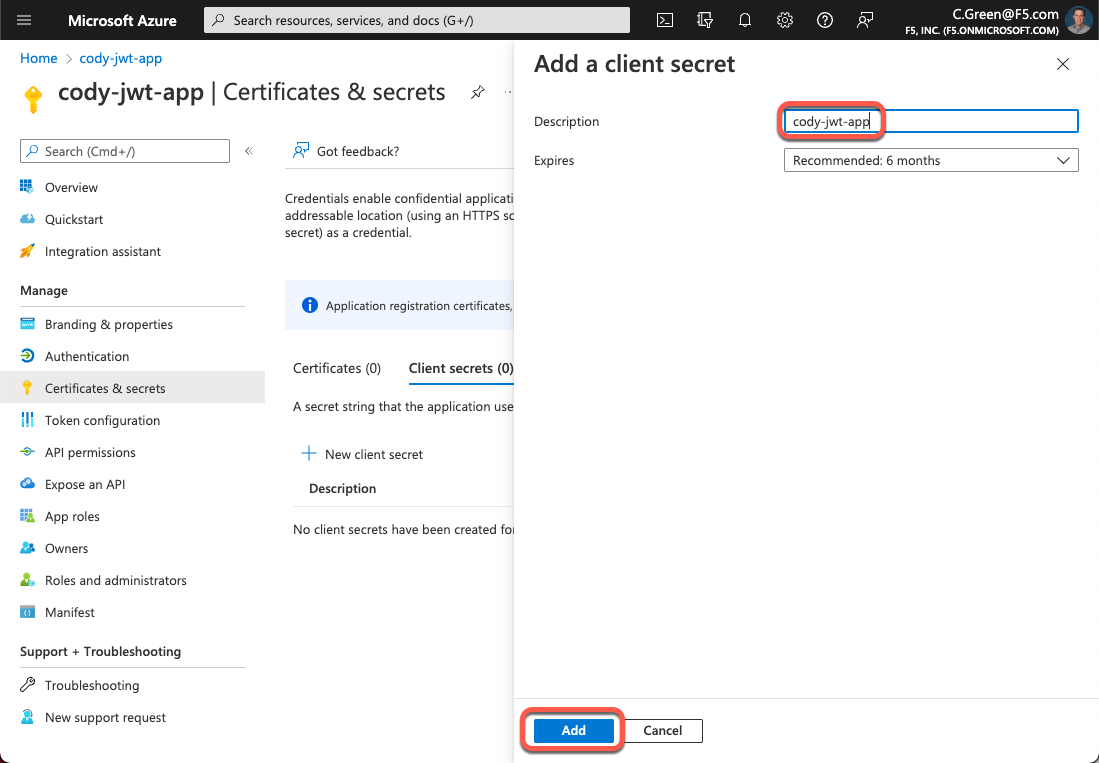
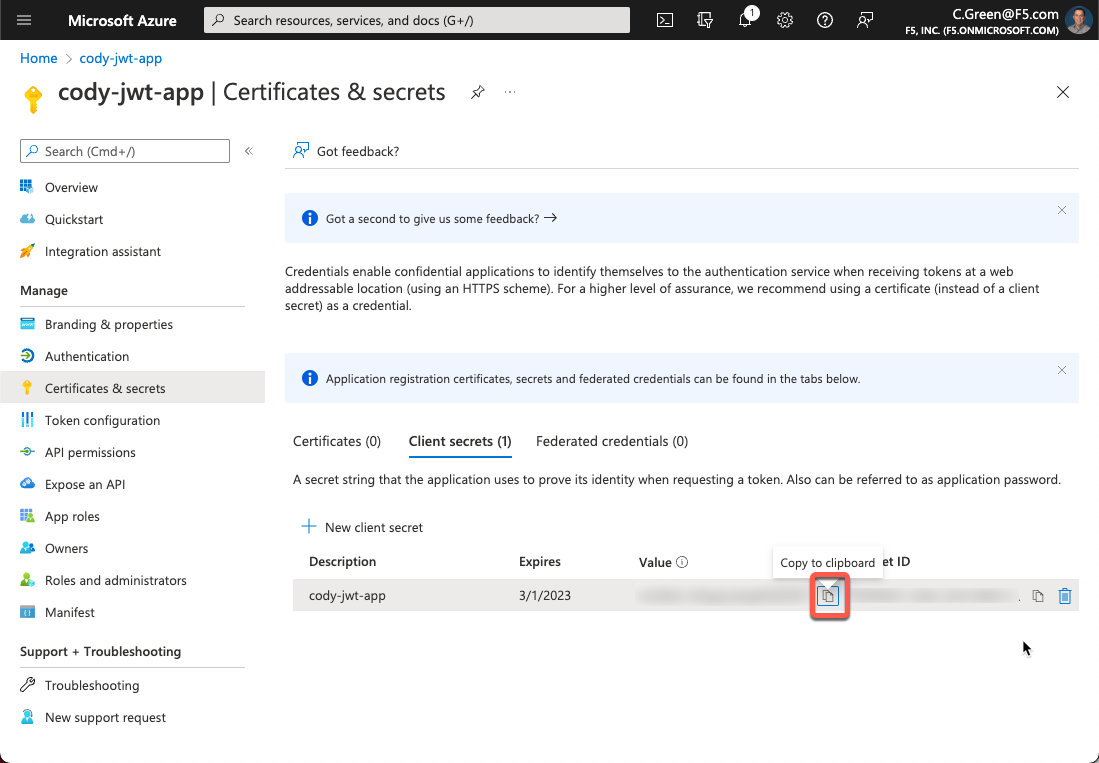
Next, copy your client secret and store it in a password vault so we can use it later.
Configure JWT Assertion in NGINX ACM
Now that we have our Azure AD application configured, we can set up our NGINX API Connectivity Manager gateway to perform JSON Web Token Assertion for our defined service. For this step, you’ll need to determine the URI for your Azure AD tenant’s JSON Web Key (JWK) Sets.
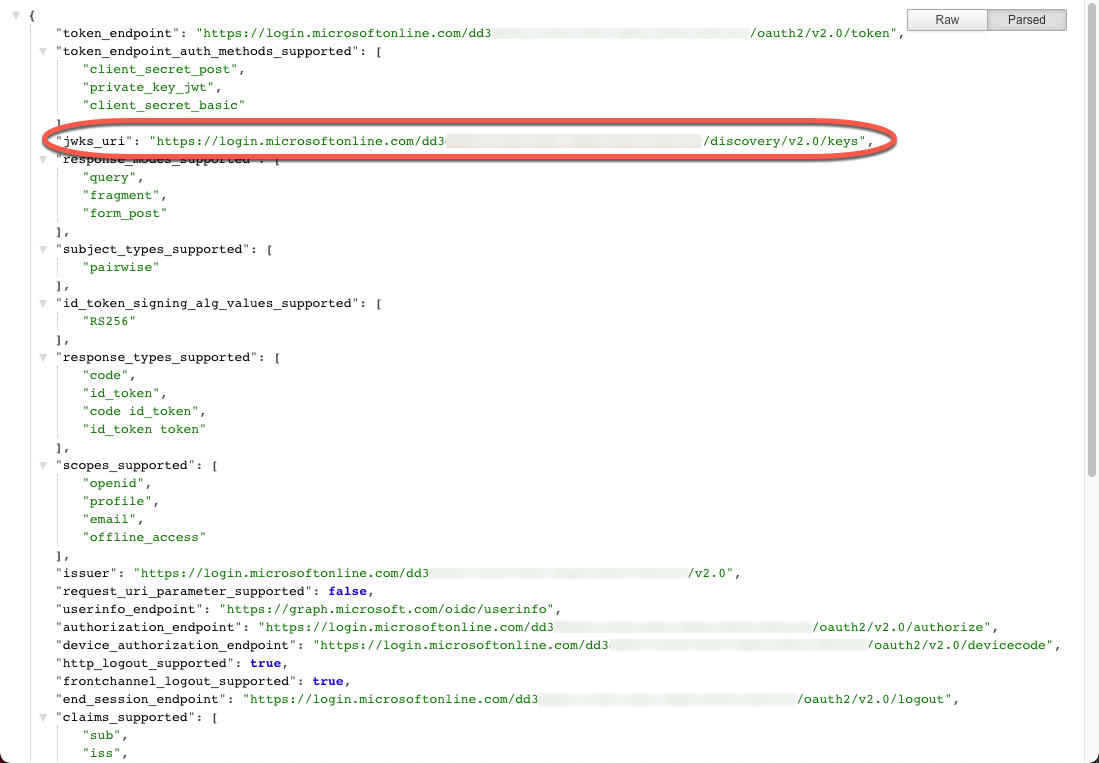
You can obtain your JWKS URI from the Azure AD tenant’s well-known endpoint:
https://login.microsoftonline.com/<tenant-id>/v2.0/.well-known/openid-configuration
This page will provide a JSON payload that contains the jwks_uri key; you will need to copy it’s value.
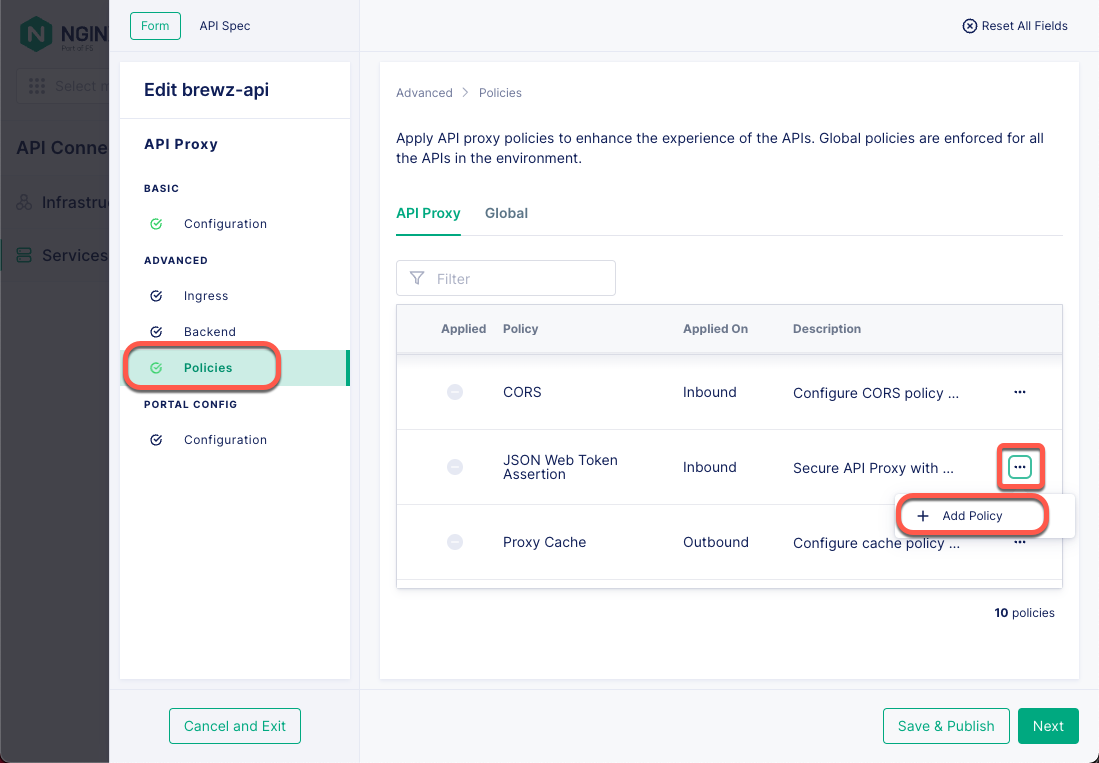
Now that you have your JWKS URI, open your NGINX API Connectivity Manager console and navigate to your service proxy’s configuration. Click Add Policy for the JSON Web Token Assertion policy.
Next, paste your Azure AD Tenant’s JKWS URI in the URI Location field, then click the Add button.

Now click the Save & Publish button to push this policy out to your API gateway.

That’s it! Your ACM instance is now configured to perform JWT Assertion on the configured service gateway.
Testing with Postman
Now, it’s time to test our setup and ensure it behaves as expected. To get started, there are a few things we will need to get from our Azure AD Application:
- Application Client Secret (you saved this earlier)
- OAuth Scope
- OAuth authorization endpoint
- OAuth token endpoint
To get the OAuth scope, open your Azure portal and navigate back to your app registration page. Next, click on the Expose an API link in the left-hand menu and click the copy button for your scope. Save this value so we can use it in a few minutes.
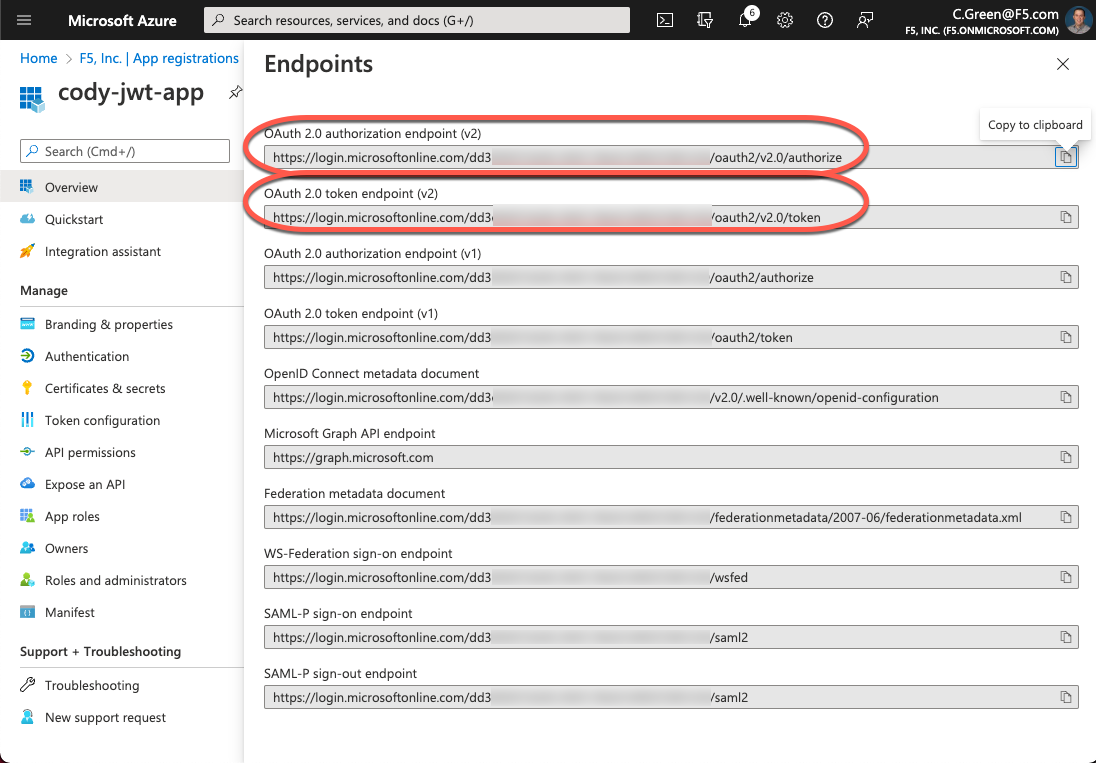
To obtain the OAuth authorization and token endpoints, we need to click on the Overview link in the left-hand menu and then click on the Endpoints button. After that, copy the authorization and token endpoint URIs.

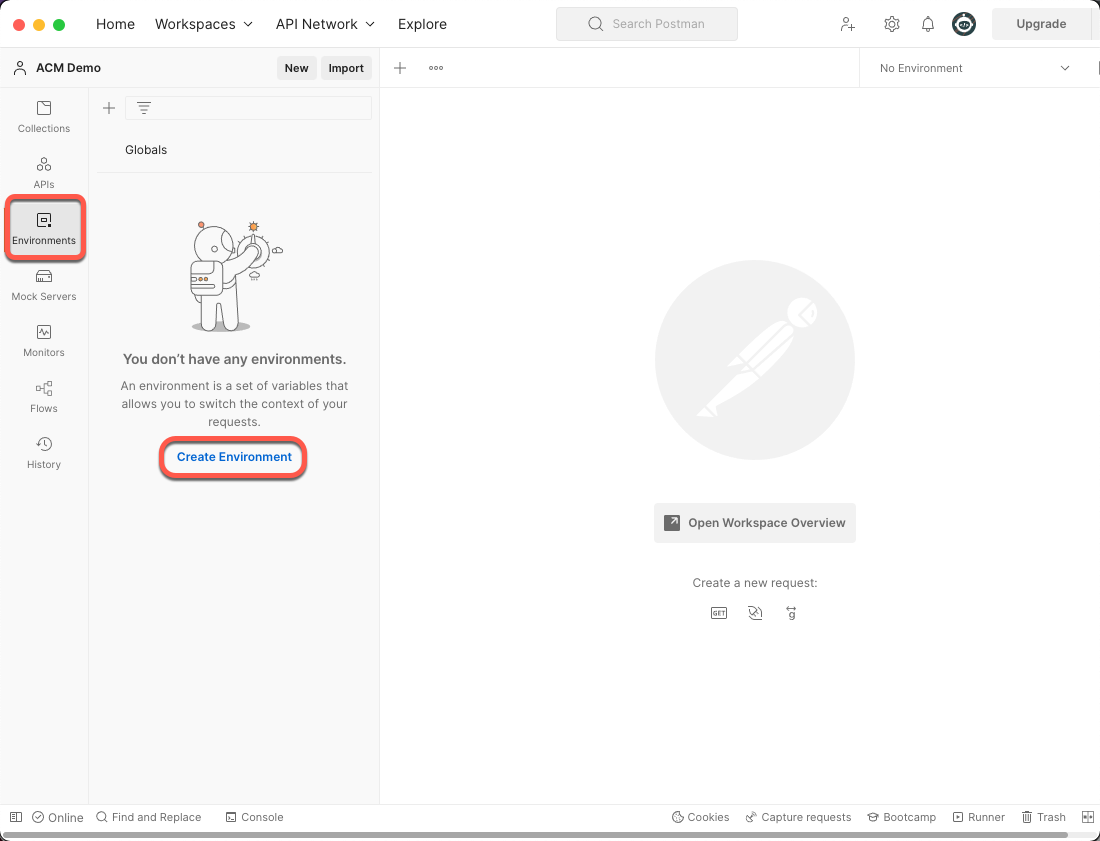
Now, open Postman and click on the Environments menu, then click the Create Environment link.
Next, name your environment and add 6 variables with the values you have saved from previous steps into the Initial Value column and the Current Value column, then click the Save button.
- client_id: Azure AD Application’s client ID
- client_secret: Azure AD Application’s client secret
- auth_url: Azure AD Tenant’s OAuth Authorization URL
- token_url: Azure AD Tenant’s OAuth Token URL
- tenant_id: Azure AD Directory (tenant) ID
- scope: Azure AD Application’s API scope with Application ID URL

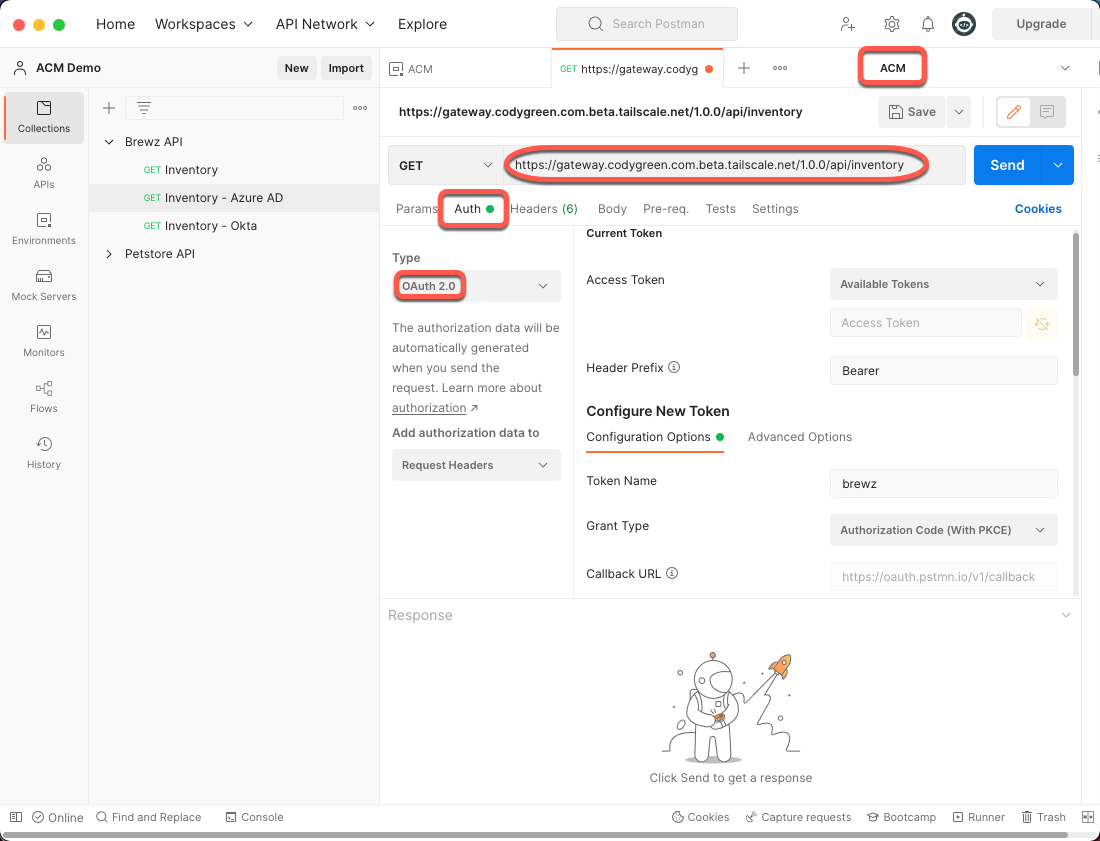
Open a new tab in Postman and perform the following steps:
- Change your Environment to ACM in the top right
- Add your API URL to the address bar
- Click the Auth tab
- Change the Type to OAuth 2.0
- Scroll down in the Auth configuration and set the following variables:
- Auth URL: {{auth_url}}
- Access Token URL: {{token_url}}
- Client ID: {{client_id}}
- Client Secret: {{client_secret}}
- Click the Get New Access Token button

A browser window will open, and you will be prompted to log in with your Azure AD credentials. Once you have successfully authenticated, you will be redirected back to Postman, and the following window will appear. Click the Use Token button.

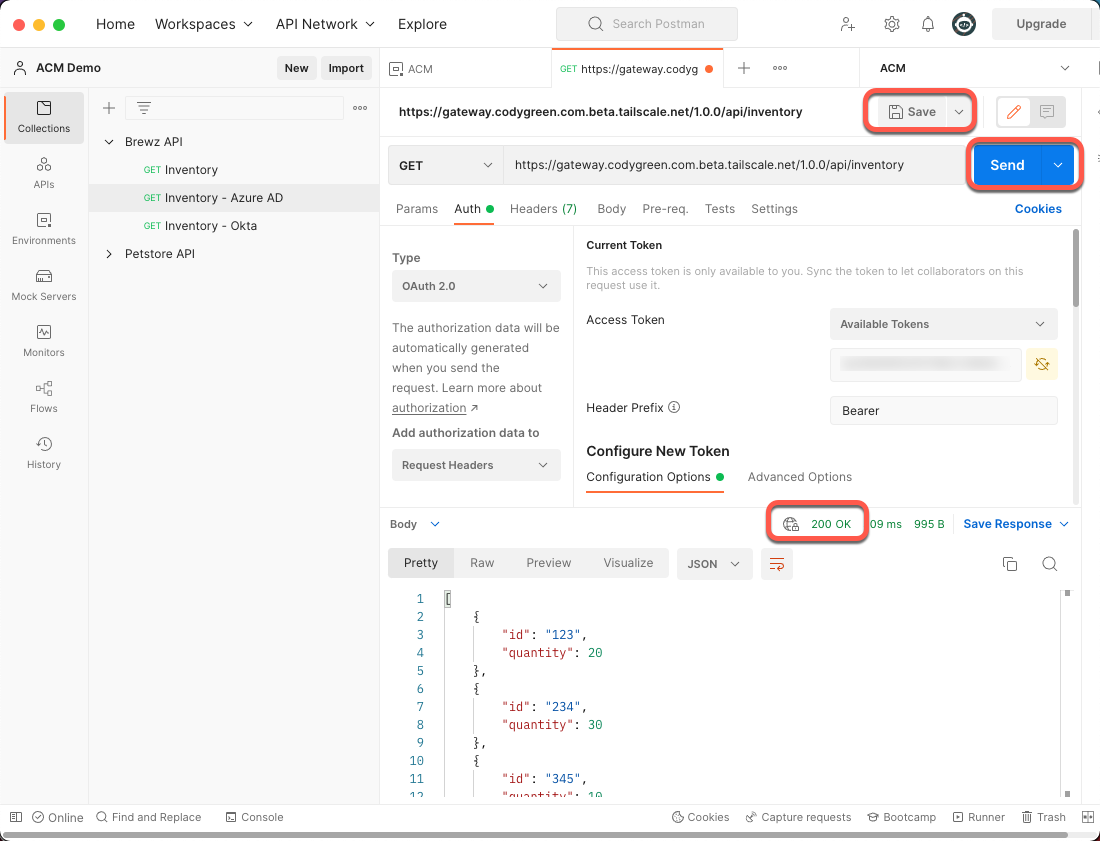
Now that we have our OAuth access token, we can finally make our API call. Click the Save button and then click the Send button.
If everything is configured correctly, you should see a 200 OK response.
Conclusion
You now have NGINX API Connectivity Manager protecting your APIs using Azure AD OAuth Access tokens. The next steps would be to add additional OAuth scopes and configure NGINX ACM gateways to pass those scopes to your protected APIs, but that’s a topic for another post.
